

 Posts


 |
| Herbs: Hong Zao, Gou Qi Zi, Dang Gui, Gan Cao
So many people love the Blood Building Syrup we make for the colder Winter season I decided to do a new one for Spring. This is much lighter and moves upward instead of downward like the heavy winter syrup. Enjoy!
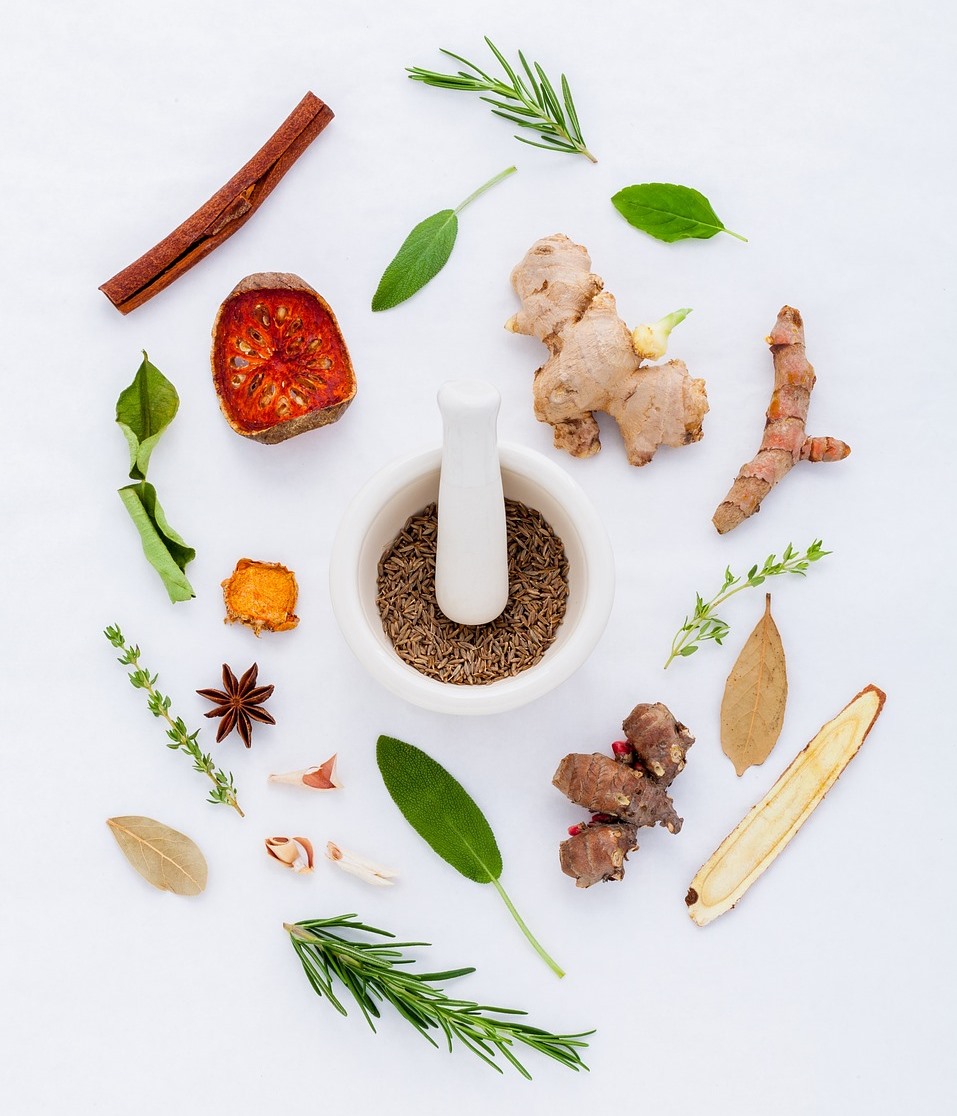
The Hong Zao and Gou Qi Zi both tonify blood, and the Gou Qi Zi is especially good for eyesight. I like this aspect because Spring is the time of the Wood Element, and Wood includes our eyes and any physical vision issues we may have. To accentuate the blood building aspect I touched the formula with Dang Gui - which I love, and then added a very small amount of Gan Cao to guide the herbs up to nourish the eyes.
Ingredients:
1 cup Hong Zao (Chinese Red Dates) 1/2 cup Gou Qi Zi (Goji Berries) 1-2 g Dang Gui (Angelica sinensis)
1-2 g Gan Cao (Licorice Root)
750 ml Brandy (Vodka or Sake can be substituted if desired) Directions: 1. Place the dried herbs in a 1 quart mason jar. 2. Pour the brandy in, up to where the jar starts to curve. You need to leave room to gently swish the herbs around. 3. Put the lid on and move to a cool dark space. 4. Gently swish/roll the jar every day for 4-6 weeks. 5. Strain and press out all the liquid which is now the herbal "wine". You can discard the herbs, or cook with the berries if you want. Store this in a jar in a dark cool place. DOSAGE: 1 spoonful (1 Tbsp) in water 1x/day up to 6 days/week. If you are adverse to alcohol, put the spoonful of wine into a small amount of just-boiled water to burn it off, which still keeps the medicinal properties of the herbs. Who should take this? This is a great formula to nourish weak eyes or blurry vision. It can also be used to help improve feeling tired, creaky joints, brittle fingernails, feeling cold often, and chronic muscle pain that doesn't respond to massage. Cautions/Contraindications: Pregnant women, those taking other medications - including Birth Control Pills - or herbs, and those with High Blood Pressure should always consult with a qualified herbalist before taking any herbs. Otherwise this is a generally safe formula for most people. |
Showing posts with label 5-Element Nutrition. Show all posts
Showing posts with label 5-Element Nutrition. Show all posts
Thursday, April 30, 2015
Blood Building Herbs for Spring & Eyes


Sunday, May 5, 2013
Step-by-Step Instructions for Doing an Enema
By Becky Makool, guest blogger
WHAT IS AN ENEMA?
An enema is the injection of a large amount of liquid into the rectum to flush out and cleanse the colon.
ONLINE RESOURCES
Here are a couple great resources to check out before you try your first enema:
• How to Do an Enema Safely from Home (Kimberly Davidson)
• Everything You Ever Wanted to Know About Giving Yourself an Enema and Were Afraid to Ask
WHEN TO DO AN ENEMA
• When you have privacy and time to relax without distractions
• Preferably anytime after you have emptied your bowels that day

HOW TO DO AN ENEMA
What You Will Need:
- A hot water bottle kit from Walgreens or any large pharmacy (costs less than $20)
- Hot water bottle
- Rubber hose P Plug P Hook P Shut-off clamp
- Nozzle (enema pipe or rectal tip)
- Organic coffee or tea or another recommended product (organic Chamomile tea works great)
- A gallon of distilled water
- KY lubricating jelly or an organic oil such as olive oil or coconut oil
- A large towel

How to Prepare (in the Kitchen) It can save a little time to do all of the following steps in the kitchen:
• Set out the items above from the hot water bottle kit.
• Attach the clamp about 6 to 8 inches from the end of the hose. You want the clamp to be positioned near the end of the hose so you can reach it easily to control or stop the flow of the fluid while you’re administering the enema. It’s also important to attach the clamp correctly so that fluid doesn’t leak out while you’re getting set up. The part of the clamp that opens and closes is the bottom of the clamp. Run the hose through the hole at the top of the clamp and out through the hole in the bottom. Then close the clamp tightly.


• Insert the nozzle into the end of the hose that is closest to the clamp.
• Insert the hook into the small hole at the top of the hot water bottle.
• The hot water bottle holds 64 ounces (half a gallon) of fluid. Heat 64 ounces of distilled water and prepare the coffee or tea following the instructions on the package. If you boil the water to make the tea or coffee, you must either add more cold water to the finished product or allow the tea or coffee to cool down to a comfortably warm temperature before you pour it into the hot water bottle. WARNING: You could easily burn yourself if the water is too hot when you administer the enema.
• Pour the fluid into the hot water bottle (using a kitchen funnel makes this easier).
• Screw the plug tightly into the hot water bottle and continue to hold the bottle upside down or else the fluid will pour out through the hole in the plug.
• Attach the upper end of the hose to the plug (after double-checking to make sure that the clamp is tightly closed at the other end of the hose).
• Turn the hot water bottle over so the hook is on top and head to the bathroom.

How to Prepare (in the Bathroom):
• Place a large towel on the bottom of the bathtub.
• Set the tube of KY jelly (or the oil) on the edge of the bathtub so it’s within easy reach.
• Hang the hot water bottle on the back of the bathroom door (on the doorknob) if the door is near the bathtub. If not, hang it on something else near the tub. You can hang it from the showerhead if that’s all that’s available, but the height of the hot water bottle determines the rate of flow of the fluid. The fluid flows more slowly if the hot water bottle is closer to you. The farther away it is, the faster the fluid will flow. It feels more comfortable when the fluid is flowing more slowly. Pressure from the intake of the fluid doesn’t build up as quickly when the flow is slower, so it tends to be easier to take in more fluid. The more you can take in, the better. The goal is to continue to take in the fluid until the hot water bottle is empty.
How to Administer the Enema:
• Sit down on the towel in the bathtub with your knees drawn up.
• Rub some KY jelly or oil on the nozzle and on your rectum.
• Insert the nozzle into your rectum, keeping your knees up, and open the clamp so the fluid will begin to flow.
• Keep your hand on the clamp or hose to prevent the nozzle from coming out as the fluid flows into your colon. You can recline back as much as possible while still holding the hose.
• Take some deep breaths and relax. The more you can relax, the easier it will be to take in more fluid. You can feel the pressure build as the fluid goes in. If the pressure is building too quickly, you can close the clamp for a minute to allow the pressure to lessen or you can partially close it to slow down the flow. Again, the goal is to take in all of the fluid. It may require a little practice (two or three enemas done over time) before you can take in all 64 ounces of fluid.
• Remove the nozzle and lay back on the towel (still keeping your knees up) after you’ve taken in all of the fluid or as much as possible.
• Continue to focus on breathing deeply as you hold the fluid in and begin to rotate your body 360 degrees from right to left. Rotating your body in this manner will allow the fluid to fully coat your colon. Lie on your right side first and try to hold that position for about 15 seconds. Then turn and lie on your stomach for about 15 seconds (or kneel and lean your forehead down on the towel if your tub is too short to permit you to stretch out). Then rotate again and lie on your left side for about 15 seconds. Finish by rotating back to your original position.
• Hold the fluid in for as long as possible. The goal is to keep it in for at least 5 minutes (up to 15 minutes), but it will probably require some practice to gradually build up to that. It helps to continue to breathe deeply and focus on relaxing while holding in the fluid. Sometimes repeating a simple mantra in your head (such as “I can, I can, I can”) can help you to relax and hold the fluid in longer, too.
• Move to the toilet when you know that you can’t hold it in any longer. Although the colon will empty fairly quickly, you may need to stay put there for 5 to 10 minutes. The colon will probably release fluid at least two or three times, if not more often.
How to Clean Up:
• Hold the hot water bottle over the bathtub or set it down in the tub and remove all of the attachments (except the hook). That way, any fluid remaining in the bottle and hose will drain into the tub and not onto your floor.
• Set the small attachments in the bathroom sink or on a washcloth or hand towel near the sink. Leave the hose in the tub.
• Rinse out the hot water bottle immediately—so the tea or coffee residue inside won’t have time to dry—by running warm water (not too hot) into it from the bathtub faucet and using a mild soap like a liquid hand soap or dish detergent. Then rinse the bottle thoroughly with warm water and hang it by the hook on the showerhead to drain and dry.
• Hold one end of the hose under the faucet and run warm water through it. Then take a sponge or a washcloth with some mild soap on it and thoroughly wipe off the outside of the hose. Rinse it in warm water and hang it over the showerhead to drain and dry.
• Wash all of the small attachments thoroughly with hot water and soap and place them on a clean towel to dry.
• Pack the hose and attachments back in the box that they came in when everything is dry and store the box under your bathroom sink or wherever you have room for it. The hot water bottle should be stored flat in a dark, cool, and dry place, so if it fits, it can go under the sink, too. Don’t place anything heavy or sharp on top of it.
• Gather up all of the dirty towels and washclothes and toss them in the washing machine.
WHAT IS AN ENEMA?
An enema is the injection of a large amount of liquid into the rectum to flush out and cleanse the colon.
ONLINE RESOURCES
Here are a couple great resources to check out before you try your first enema:
• How to Do an Enema Safely from Home (Kimberly Davidson)
• Everything You Ever Wanted to Know About Giving Yourself an Enema and Were Afraid to Ask
WHEN TO DO AN ENEMA
• When you have privacy and time to relax without distractions
• Preferably anytime after you have emptied your bowels that day

- A hot water bottle kit from Walgreens or any large pharmacy (costs less than $20)
- Hot water bottle
- Rubber hose P Plug P Hook P Shut-off clamp
- Nozzle (enema pipe or rectal tip)
- Organic coffee or tea or another recommended product (organic Chamomile tea works great)
- A gallon of distilled water
- KY lubricating jelly or an organic oil such as olive oil or coconut oil
- A large towel

How to Prepare (in the Kitchen) It can save a little time to do all of the following steps in the kitchen:
• Set out the items above from the hot water bottle kit.
• Attach the clamp about 6 to 8 inches from the end of the hose. You want the clamp to be positioned near the end of the hose so you can reach it easily to control or stop the flow of the fluid while you’re administering the enema. It’s also important to attach the clamp correctly so that fluid doesn’t leak out while you’re getting set up. The part of the clamp that opens and closes is the bottom of the clamp. Run the hose through the hole at the top of the clamp and out through the hole in the bottom. Then close the clamp tightly.


• Insert the hook into the small hole at the top of the hot water bottle.
• The hot water bottle holds 64 ounces (half a gallon) of fluid. Heat 64 ounces of distilled water and prepare the coffee or tea following the instructions on the package. If you boil the water to make the tea or coffee, you must either add more cold water to the finished product or allow the tea or coffee to cool down to a comfortably warm temperature before you pour it into the hot water bottle. WARNING: You could easily burn yourself if the water is too hot when you administer the enema.
• Pour the fluid into the hot water bottle (using a kitchen funnel makes this easier).
• Screw the plug tightly into the hot water bottle and continue to hold the bottle upside down or else the fluid will pour out through the hole in the plug.
• Attach the upper end of the hose to the plug (after double-checking to make sure that the clamp is tightly closed at the other end of the hose).
• Turn the hot water bottle over so the hook is on top and head to the bathroom.

• Place a large towel on the bottom of the bathtub.
• Set the tube of KY jelly (or the oil) on the edge of the bathtub so it’s within easy reach.
• Hang the hot water bottle on the back of the bathroom door (on the doorknob) if the door is near the bathtub. If not, hang it on something else near the tub. You can hang it from the showerhead if that’s all that’s available, but the height of the hot water bottle determines the rate of flow of the fluid. The fluid flows more slowly if the hot water bottle is closer to you. The farther away it is, the faster the fluid will flow. It feels more comfortable when the fluid is flowing more slowly. Pressure from the intake of the fluid doesn’t build up as quickly when the flow is slower, so it tends to be easier to take in more fluid. The more you can take in, the better. The goal is to continue to take in the fluid until the hot water bottle is empty.
How to Administer the Enema:
• Sit down on the towel in the bathtub with your knees drawn up.
• Rub some KY jelly or oil on the nozzle and on your rectum.
• Insert the nozzle into your rectum, keeping your knees up, and open the clamp so the fluid will begin to flow.
• Keep your hand on the clamp or hose to prevent the nozzle from coming out as the fluid flows into your colon. You can recline back as much as possible while still holding the hose.
• Take some deep breaths and relax. The more you can relax, the easier it will be to take in more fluid. You can feel the pressure build as the fluid goes in. If the pressure is building too quickly, you can close the clamp for a minute to allow the pressure to lessen or you can partially close it to slow down the flow. Again, the goal is to take in all of the fluid. It may require a little practice (two or three enemas done over time) before you can take in all 64 ounces of fluid.
• Remove the nozzle and lay back on the towel (still keeping your knees up) after you’ve taken in all of the fluid or as much as possible.
• Continue to focus on breathing deeply as you hold the fluid in and begin to rotate your body 360 degrees from right to left. Rotating your body in this manner will allow the fluid to fully coat your colon. Lie on your right side first and try to hold that position for about 15 seconds. Then turn and lie on your stomach for about 15 seconds (or kneel and lean your forehead down on the towel if your tub is too short to permit you to stretch out). Then rotate again and lie on your left side for about 15 seconds. Finish by rotating back to your original position.
• Hold the fluid in for as long as possible. The goal is to keep it in for at least 5 minutes (up to 15 minutes), but it will probably require some practice to gradually build up to that. It helps to continue to breathe deeply and focus on relaxing while holding in the fluid. Sometimes repeating a simple mantra in your head (such as “I can, I can, I can”) can help you to relax and hold the fluid in longer, too.
• Move to the toilet when you know that you can’t hold it in any longer. Although the colon will empty fairly quickly, you may need to stay put there for 5 to 10 minutes. The colon will probably release fluid at least two or three times, if not more often.
How to Clean Up:
• Hold the hot water bottle over the bathtub or set it down in the tub and remove all of the attachments (except the hook). That way, any fluid remaining in the bottle and hose will drain into the tub and not onto your floor.
• Set the small attachments in the bathroom sink or on a washcloth or hand towel near the sink. Leave the hose in the tub.
• Rinse out the hot water bottle immediately—so the tea or coffee residue inside won’t have time to dry—by running warm water (not too hot) into it from the bathtub faucet and using a mild soap like a liquid hand soap or dish detergent. Then rinse the bottle thoroughly with warm water and hang it by the hook on the showerhead to drain and dry.
• Hold one end of the hose under the faucet and run warm water through it. Then take a sponge or a washcloth with some mild soap on it and thoroughly wipe off the outside of the hose. Rinse it in warm water and hang it over the showerhead to drain and dry.
• Wash all of the small attachments thoroughly with hot water and soap and place them on a clean towel to dry.
• Pack the hose and attachments back in the box that they came in when everything is dry and store the box under your bathroom sink or wherever you have room for it. The hot water bottle should be stored flat in a dark, cool, and dry place, so if it fits, it can go under the sink, too. Don’t place anything heavy or sharp on top of it.
• Gather up all of the dirty towels and washclothes and toss them in the washing machine.
Saturday, December 29, 2012
Cabbage Pasta Recipe - Delicious!
Some of the most important vegetables to add into our
regular diet are:
- Cabbage
- Cauliflower
- Broccoli
- Brussel Sprouts
When eaten on a regular basis and in sufficient quantity, it
can be difficult to have certain cancers in our digestive system. These incredible veggies just keep our system
too clean and detoxified, and also very importantly help to cleanse our blood.
From a Chinese medicine point of view, our blood is a highly
spiritual aspect of our physical body.
It is the substance ruled by our Heart – the special place that “houses
our Spirit”. I like to think of it as the messenger that carries divine insight
to every cell of our entire being.
When our blood is abundant and pure it is very easy for us
to experience deep happiness and joy, regular belly laughter, and an intense
satisfaction and wonder with life.
When our blood is deficient or impure we can find ourselves
overly tired, stressed out, agitated, and restless. It’s very difficult to feel
happy and full of life in this state.
Going even further, too many toxicities in the blood can engender states
of cruelty, violence, and extreme acts of hate.
Here’s a very easy cabbage recipe I’d like to share. (I’ll add a picture next time I make it). I like to use the Juniper Berries because
they go great with cabbage, and they help to heal our hearts. The medicinal mushrooms are included because they have an amazing effect on our blood, immune system, AND they are delicious. Enjoy!
Cabbage Pasta
1 head green cabbage, sliced into thin strips
1 Maitake mushroom, or 8 shiitake mushrooms (reconstituted
if dried), chopped
2 cloves garlic, chopped
1 Tbsp olive oil
1-2 Tbsp Soy Sauce
1 Tbsp freshly ground juniper berries
hot pepper to taste (optional)
2 cups cooked whole grain spaghetti noodles (break the
noodles into 2-3 inch pieces before cooking)
Directions:
In a frying pan (cast iron works great), heat the olive oil
and when hot sauté the cabbage, mushrooms, and garlic. When almost done (about 10 minutes) add the
spaghetti noodles, stir, then add the soy sauce and sauté about 2 minutes
longer. Turn off the heat and add the
juniper berries and hot pepper.
Use this as an alternative to regular spaghetti and top with
your favorite sauce, meatballs, or other veggies.
Tuesday, October 30, 2012
Black Bean Soup
This soup is special for the Water Element and helps to strengthen our kidneys. It uses several foods that are especially beneficial to the kidneys: black beans, barley, cinnamon, cloves, quality sea salt, black sesame seeds, and kombu seaweed. I cooked the beans in a pressure cooker because this method forces the flavor and nutrition deep inside, just like our Water Element is deep inside. According to Paul Pitchford, author of Healing With Whole Foods, pressure cooking can be used to tap into deep core issues that we have, releasing them to enhance our spirituality.
If you don’t have a pressure cooker, this can be cooked on
the stovetop – it just takes about 2 hours longer, OR you can use canned black
beans.
Step 1: Prepare the
black beans by soaking 1 package of dried beans in a bowl of water
overnight. (Skip this step if using
canned black beans.)
Next Day, Prepare the Soup:
1. In a pressure
cooker pot, place 1 tsp cumin seeds, 1 strip rinsed kombu seaweed, ½ cinnamon
stick, 2 cloves, 2 bay leaves, and the rinsed pre-soaked black beans. Cover with water at least 2 inches above the
beans and 3 Tbsp olive oil. Place the
cover on the pot and bring to pressure (see the directions for your pressure
cooker). When pressure is reached, lower
heat and cook for 10 minutes. Remove
from heat, release the steam and open.
Do not drain.
2. Check the beans –
they should be slightly soft and perfectly done. Remove the bay leaves, cloves (if you can
find them floating), and cinnamon stick.
3. Remove the Kombu
square. Now softened, cut it up into
tiny squares and re-add back into the soup.
4. Place the pot back
on low heat and add the following ingredients, preferably organic:
1-15-oz can peeled & chopped tomatoes
1 container of your favorite salsa pureed with 1 cup fresh
cilantro
1 orange, peeled, de-seeded, and chopped into small chunks
1 green pepper, chopped
¼ cup uncooked barley
1 Tbsp ground cumin
2 Tbsp powdered vegetable broth
1 Tbsp powdered shiitake mushrooms
1 tsp quality sea salt, or to taste
½ tsp black sesame seeds
Cover (but don’t pressurize) and cook over low heat until
the barley is soft, about 35-45 minutes.
Ready to serve!
Wednesday, September 26, 2012
True Warrior Immune Boosting Soup
From my workshop tonight on 5-Element Nutrition, here is a delicious Metal Element immune boosting soup that is quick and easy to make. If you are familiar with cooking with Chinese herbs, it would also be excellent to add one or more of the following, depending on actions desired: Huang Qi, Ren Shen, Bei Sha Shen, Chen Pi, Xing Ren.
In a soup pot, place the following ingredients:
8-10 cups water (OR 2-4 cups broth with additional water)
1 cup sweet rice, rinsed
½ lemon – sliced very thin w/ peel on
2 Tbsp Vegetable or Chicken Broth Powder
1 Tbsp Shiitake Mushroom Powder (optional)
1 Tsp quality sea salt
Bring to an almost boil, then lower heat and cook until rice
is tender, about 20 minutes. Next add:
1 pear, peeled & sliced thin
1 spoonful (to taste) dried hot chili peppers
Cook another 15 minutes, remove from heat.
In a frying pan, sauté the following together until slightly
crispy:
1 Tbsp olive oil
2-3 cloves garlic, chopped
1” fresh ginger root, peeled & chopped
2 cups baby Bok Choy
4 shiitake mushrooms, sliced
Sprinkle of soy sauce
When done, add to the rest of soup and serve.
Sunday, July 15, 2012
Cleansing Vs. Building Foods
In 5-element nutrition consulting we see a lot of people who want to change their health, know that eating better is a way to do that, but find it really difficult to "give up" the food they love.
I know how attached we are to the food we eat, and most people, including me, won't change their habits unless there is a huge motivating factor - like a severe medical diagnosis (diabetes, heart attack) or an emotionally passionate reason (new romantic love, high school reunion).
Cleansing foods clean your internal organs and make your body lighter. These are mainly fruits and vegetables. Which is better - cooked or raw? From a 5-element nutrition point of view, it depends on what you need, and we suggest both are important.

I know how attached we are to the food we eat, and most people, including me, won't change their habits unless there is a huge motivating factor - like a severe medical diagnosis (diabetes, heart attack) or an emotionally passionate reason (new romantic love, high school reunion).
 |
| Pasta is a Building food. Balance it out by adding a mixed green salad and cutting the portion size of the pasta. |
Here's an easy 5-element nutrition tip to consider: Foods are either building (Yin) or cleansing (Yang).
Building foods add to your body, make it larger. These are most foods that are NOT fruits and vegetables. If you exercise a lot that might translate into muscle. If you don't exercise a lot, we all know that it turns into the "other muscle", fat. Building foods in moderation are great for someone who needs to put on weight. BTW, regardless of what congress mandates, pizza is not a vegetable.Cleansing foods clean your internal organs and make your body lighter. These are mainly fruits and vegetables. Which is better - cooked or raw? From a 5-element nutrition point of view, it depends on what you need, and we suggest both are important.
- Cooked is going to be on the milder side of cleansing, better for someone who tends towards being weak, deficient, feels cold, or has frequent colds/flu.
- Raw is going to be on the harsher side of cleansing, better for someone who tends towards being robust, loud, feels warm or hot, has high blood pressure from stress, and may tend to get gall or kidney stones.

The ultimate goal is to find an appropriate BALANCE between cleansing and building foods. An appropriate balance is different for each person, so it depends on what you need in order to reach your ultimate weight goals.
If you want to lose weight, or you love pasta and don't want to "give it up", start by realizing that pasta is a building food. Balance it with a cleansing food of equal or greater proportion and decrease the serving size of pasta you would normally have eaten. Cleansing foods are the only realistic way to lose weight, and you can use them in a way to still enjoy the food you love.
This is going to be the same for all other building foods. If you have pizza, maybe have just 1 or 2 slices and eat a raw carrot with each slice. Yes, that is a whole beautiful raw carrot with each slice.
Steak? Have a nice juicy piece no bigger than the size of your palm, cover it with a medicinal mushroom saute and fill the rest of the plate with lettuce and chopped raw veggies like radishes, broccoli, green peppers, topped with hemp oil and balsamic vinegar & fresh ground black pepper.
This is a good place to start, by adding some balance. Once you get used to doing this and enjoy it - which you will because your body and blood will love more balance - then take the next step and refine what you're eating a little more. We like lasting changes that are enjoyable, not quick or extreme diets that you can't wait to end.
"Everything in Moderation, Everything in Balance"
~Taoist principle
~Taoist principle
Thursday, July 12, 2012
Blood Building Syrup - Herbal Recipe
If you like this recipe, also try our Blood Building "wine" for Spring and Eyes - it's a lighter version that is not so warming and invigorating. The syrup below is better suited to Winter and colder months.
Back in March one of my Twitter friends posted this recipe, and finally today I spent a glorious morning making it! I think it's worth sharing with you - enjoy!

Who needs this?
The original author, Todd Caldecott, lists from an Ayurvedic perspective that this is "an excellent preparation to help build up the blood in anemia, infertility, exhaustion, and immunodeficiency, or when recovering from chronic disease, medical treatments (e.g. chemotherapy) or surgery."
Additionally, from a Chinese medicine point of view I would add someone feeling weak and tired, loud creaky joints, after child birth, pale complexion and feels cold, very dry skin, poor vision, and chronic muscle pains that don't respond to massage.
To explain this very basically, blood is a major resource of our body. It's one of the main substances that helps to re-build or re-generate our physical being. We make blood from the food and drink we ingest, however if our diet isn't sufficient or we're so stressed and exhausted that our system is too tired to build blood we can get too low on our resources.
It's a good idea to also drink lots of water - because our blood is made up of about 83% water. Herbs that build blood will require extra water, and they may even make you more thirsty to ensure you drink some. Please note I did not say drink more liquids, such as tea, soda pop, etc., I said water - pure and simple.
It's also a good idea to add some blood building foods into your diet, such as leafy greens, beets, cherries, blueberries, and strawberries.
Last of all, because this will help you to have more resources, you'll start to feel more energized, get more accomplished, have amazing motivation, and you might want to spontaneously dance or even just walk more outside in nature. Do it!
Disclaimer: It is not recommended to take herbs if you are also taking other herbs or medications, or if you question whether any of the symptoms above apply to you. Please consult a qualified health care provider before consuming this product.
After feedback from people who have tried this recipe, I wanted to make a video demonstration to show some of the nuances that make this really good. I recommend watching the video first, then following the written directions below. Enjoy!
Blood Building Syrup - click on title for the original site this is posted on, Food As Medicine
Step 1: Gather the ingredients. You will probably need to visit a Chinese herbalist (such as The Oriental Healing Arts Center, or your local acupuncturist), and maybe a specialty spice shop (such as Summit Spice & Tea) for a few items, so take some time to get it all together.
Ingredients:
1/2 cup chopped dried figs
1/2 cup dried goji berries (Chinese herb: Gou Qi Zi)
1/2 cup dried prunes, also called dried plums
1/2 cup Chinese red dates (Chinese herb: Hong Zao)
1 oz. asparagus root (Chinese herb: Tien Men Dong, Ayurvedic herb: shatavari root)
1 oz. prepared rehmannia (Chinese herb: Shu Di Huang)
1 oz. astragulus root (Chinese herb: Huang Qi)
1 oz. American ginseng (Chinese herb: Xi Yang Shen)
2 quarts water
2-3 tbs ghee (Indian clarified butter)
2 tbsp Long Pepper, ground (Ayurvedic herb: pippali powder)
1 tsp cardamom powder
1 tsp cinnamon powder
1/2 tsp clove powder
1/4 tsp pink salt (Himalayan)
1 cup organic molasses (approximately)
Directions and my notes:
Add the dried fruit and herbs (first 8 ingredients) to a pot along with 2 quarts of water, bring to a boil and simmer until it is reduced to a syrup-like consistency and the fruit and herbs are squishy. (NOTE: the original recipe says this takes about 1 hour, however it took me 2.5 hours - maybe because it's cold in Alaska?)
Allow the fruit-herb decoction to cool, then mix in a blender until smooth. Strain the liquid through a mesh strainer into a measuring cup, taking note of exactly how much liquid you are left with. (NOTE: Per original recipe I was expecting to have 1 cup liquid, however I ended up with about 2 cups still left after straining. It was quite thick.)
In a separate pan, melt the ghee on medium heat and add the pippali, cardamom, cinnamon, clove and pink salt. (NOTE: The ghee heated up so fast that I ended up turning the heat down to very low because it kept bubbling and popping up.)
Cook on low heat for about 10-15 minutes, stirring frequently. Pour into a clean, dry glass bottle, seal and store in a cool location. Dose is 1-2 Tbsp twice daily, with warm water.
NOTE: Cooking this smelled herby and delicious! I took a dose when it was finished, and the taste is very spicy but pleasant - not really sweet at all the first day, but developed a really nice sweetness overnight. The energy was warming, went to the center and spread out. Felt very nurturing. I'm really happy with this recipe!
Cynthia McMullen is certified in Taoist Herbology and teaches the 5-Element Nutrition Workshops at Alaska Institute of Oriental Medicine, Acupuncture and Massage Therapy. Follow her on Facebook TouchOfTao
Back in March one of my Twitter friends posted this recipe, and finally today I spent a glorious morning making it! I think it's worth sharing with you - enjoy!

The original author, Todd Caldecott, lists from an Ayurvedic perspective that this is "an excellent preparation to help build up the blood in anemia, infertility, exhaustion, and immunodeficiency, or when recovering from chronic disease, medical treatments (e.g. chemotherapy) or surgery."
Additionally, from a Chinese medicine point of view I would add someone feeling weak and tired, loud creaky joints, after child birth, pale complexion and feels cold, very dry skin, poor vision, and chronic muscle pains that don't respond to massage.
To explain this very basically, blood is a major resource of our body. It's one of the main substances that helps to re-build or re-generate our physical being. We make blood from the food and drink we ingest, however if our diet isn't sufficient or we're so stressed and exhausted that our system is too tired to build blood we can get too low on our resources.
It's a good idea to also drink lots of water - because our blood is made up of about 83% water. Herbs that build blood will require extra water, and they may even make you more thirsty to ensure you drink some. Please note I did not say drink more liquids, such as tea, soda pop, etc., I said water - pure and simple.
It's also a good idea to add some blood building foods into your diet, such as leafy greens, beets, cherries, blueberries, and strawberries.
Last of all, because this will help you to have more resources, you'll start to feel more energized, get more accomplished, have amazing motivation, and you might want to spontaneously dance or even just walk more outside in nature. Do it!
Disclaimer: It is not recommended to take herbs if you are also taking other herbs or medications, or if you question whether any of the symptoms above apply to you. Please consult a qualified health care provider before consuming this product.
After feedback from people who have tried this recipe, I wanted to make a video demonstration to show some of the nuances that make this really good. I recommend watching the video first, then following the written directions below. Enjoy!
Blood Building Syrup - click on title for the original site this is posted on, Food As Medicine
Step 1: Gather the ingredients. You will probably need to visit a Chinese herbalist (such as The Oriental Healing Arts Center, or your local acupuncturist), and maybe a specialty spice shop (such as Summit Spice & Tea) for a few items, so take some time to get it all together.
Ingredients:
1/2 cup chopped dried figs
1/2 cup dried goji berries (Chinese herb: Gou Qi Zi)
1/2 cup dried prunes, also called dried plums
1/2 cup Chinese red dates (Chinese herb: Hong Zao)
1 oz. asparagus root (Chinese herb: Tien Men Dong, Ayurvedic herb: shatavari root)
1 oz. prepared rehmannia (Chinese herb: Shu Di Huang)
1 oz. astragulus root (Chinese herb: Huang Qi)
1 oz. American ginseng (Chinese herb: Xi Yang Shen)
2 quarts water
2-3 tbs ghee (Indian clarified butter)
2 tbsp Long Pepper, ground (Ayurvedic herb: pippali powder)
1 tsp cardamom powder
1 tsp cinnamon powder
1/2 tsp clove powder
1/4 tsp pink salt (Himalayan)
1 cup organic molasses (approximately)
 |
| This is the Long Pepper (Pippali Powder) I was lucky enough to find at our local Summit Spice & Tea. I just ground it to a powder in a little electric spice grinder. Taste is peppery, but much milder and a little earthier than black pepper. |
Directions and my notes:
 |
| Dry fruit-herbs |
Add the dried fruit and herbs (first 8 ingredients) to a pot along with 2 quarts of water, bring to a boil and simmer until it is reduced to a syrup-like consistency and the fruit and herbs are squishy. (NOTE: the original recipe says this takes about 1 hour, however it took me 2.5 hours - maybe because it's cold in Alaska?)
 |
| After reducing to a syrup |
 |
| Blended & Strained |
 |
| MMM....spices - the large pile on bottom left is the ground Long Pepper. |
 |
| Spices cooking in ghee |
Cook for a minute and then add the fruit herb decoction to this, along with an equal part molasses. (NOTE: because the recipe called for approximately 1 cup molasses but I had ended up with 2 cups fruit herb decoction, I only added 1 full cup of molasses. When pouring, remember the saying "slow as molasses".... this is where it comes from.)
Cook on low heat for about 10-15 minutes, stirring frequently. Pour into a clean, dry glass bottle, seal and store in a cool location. Dose is 1-2 Tbsp twice daily, with warm water.
NOTE: Cooking this smelled herby and delicious! I took a dose when it was finished, and the taste is very spicy but pleasant - not really sweet at all the first day, but developed a really nice sweetness overnight. The energy was warming, went to the center and spread out. Felt very nurturing. I'm really happy with this recipe!
Cynthia McMullen is certified in Taoist Herbology and teaches the 5-Element Nutrition Workshops at Alaska Institute of Oriental Medicine, Acupuncture and Massage Therapy. Follow her on Facebook TouchOfTao
Thursday, June 28, 2012
5-Element Nutrition: Balance Your Wood Element - Recipes
As requested, from my recent workshop, these are the 4
recipes we ate to balance our Wood Element (Liver/GallBladder). Unless noted, recipes are my own.
1) Kindness Water
In a 1 gallon water pitcher, combine the following:
Organic lemon slices
Organic lime slices
Organic grapefruit slices
- remove any seeds,
but leave the peel on all of the citrus fruit to intensify the sour flavor that
benefits the Liver.
- use 2-3 thin slices
of each.
1 sprig fresh mint leaves
Fill with purified water, let sit for at least 15 minutes,
serve.
From a Chinese medicine point of view, water is best served
room temperature. Ok to refrigerate this
up to 3 days.
2) Green Apple Salad
Tart green apples are excellent for the Liver. In addition, this salad is light and
refreshing, making a great Spring side dish.
Combine in a bowl:
3 organic Green Apples, peeled, sliced into small pieces
4 stalks organic Celery, rinsed, chopped into small pieces
¼ cup toasted Walnuts, bake at 250 degrees for 20 minutes
then chop
½ cup Raisins, I used organic Sunview brand green seedless,
which are really plump and sweet.
Drizzle 1 large spoonful honey over the top. I used Wee Bee Honey, naturally raw with
pollen, propolis, and honeycomb bits in it.
Add 1 cup plain yogurt.
Stir everything together and serve.
3) Potato Cauliflower
Curry (Aloo Gobi)
This is a recipe I tried from a great book, The Healing Spices by Bharat Aggarwal, PhD, 2011. I
included it because it highlights Turmeric which is a spice that is incredible
for the Liver. It's also very important to find delicious ways to get anti-cancer vegetables into our food as often as possible (cauliflower, broccoli, cabbage, kale, brussel sprouts).
Ingredients:
2 Tbs vegetable or olive oil
2 tsp turmeric
1 tsp cumin seed
1 shallot, finely chopped
3 cloves garlic, chopped
1 28-oz can diced tomatoes
1 medium head cauliflower, cut into florets
1 ½ lbs. russet potatoes, peeled and cut into large chunks
½ tsp diced fresh ginger
½ tsp chili power
¼ tsp freshly ground black pepper
1 Tbs garam masala (Indian spice mixture)
Salt, to taste
¼ cup chopped cilantro (optional)
1. Heat the oil in a
large pot over medium heat. Add the
turmeric and cumin seeds until the spices render their aroma, about 30 seconds.
Add the chopped shallot and garlic and sauté, stirring frequently, until the
shallots are soft, about 8 minutes.
2. Stir in the diced
tomatoes, cauliflower, potatoes, ginger, chili powder, and ground pepper. Reduce the heat, cover partially, and cook
for 40 minutes, stirring frequently. If
the curry appears too dry and the vegetables start to stick to the pan, add
some water.
3. Add the garam
masala, simmer 5 minutes. Turn off the heat and keep covered until ready to
serve. Sprinkle with cilantro, if using,
and serve.
4) Millet & Maitake Mushroom Curry
I thought the above recipe for Potato Cauliflower Curry
needed something to go with other than plain rice, so I made this dish as a
similar complement. Millet is a
delicious yellow earthy grain that benefits the Liver, and Maitake is a medicinal mushroom which strongly supports the Liver. This recipe also highlights turmeric,
“guardian of the liver”.
1. Put the millet on
to cook. Use 1 cup millet to 3 cups
water, bring to a boil, turn down heat and simmer until done – about 20-30
minutes. Remove from heat and let sit
covered when done.
2. Make the Maitake
Mushroom Curry.
Ingredients:
1 Tbsp olive oil
1 fresh Maitake mushroom, rinsed and chopped. Ok to substitute a re-constituted dried
Maitake if fresh is not available. 8 Shiitake
mushrooms (fresh or dried) would also be a viable substitute.
1 28-oz can peeled, ground tomatoes
2 cloves garlic, chopped
1 inch fresh ginger root, peeled and chopped
1 tsp ajwain seeds
1 tsp turmeric
1 tsp ground cumin
1 tsp garam masala
2 tsp curry powder (I used a Madras Curry variety from
Summit Spice & Teas)
Salt and fresh ground black pepper to taste
1. In a cast iron or
other skillet, heat the olive oil. When
hot, add the ajwain seeds and turmeric.
Wait about 15 seconds then add the chopped garlic and ginger. Stir.
2. Add the chopped
Maitake mushroom and stir until the mushroom is starting to brown, about 5-8
minutes.
3. Add the can of
tomatoes, turmeric, ground cumin, garam masala, and curry powder. Stir.
Add salt and pepper to taste, stir again.
4. Add the millet 1
large spoonful at a time, stirring in, until desired consistency is
formed. Ok to add a little more water if
needed. I like this to be slightly on
the wet side, rather than thick and dry.
Serve.
Keep any unused millet refrigerated for 4-5 days. Add to a soup like rice, or even mix with
oatmeal in the morning.
Cynthia McMullen, Program Director at Alaska Institute of Oriental Medicine, Acupuncture & Massage Therapy, teaches a very popular 12-chapter series in 5-Element Nutrition. Workshops are held once each month, open to the general public. For more information: www.touchoftao.com
Wednesday, May 23, 2012
Cooking With Chinese Herbs
As promised, here is the recipe for the soup I made at tonight's 5-Element Nutrition workshop on Chinese Herbal Healing Broths.
This soup is delicious and gives a good idea of how you can play around with edible Chinese herbs. The purpose was to give workshop participants a sample of how easy yet deeply satisfying herbal broths can be, and also how strongly you can "feel the Qi" from them!
Step 1: either make your own broth (vegetable or meat), or use an organic pre-made broth of your choice. I usually use 4 cups of broth and add additional water as needed.
Step 2: Get the herbs ready to add to the broth. For this recipe I used Huang Jing, Kombu, 1 dried Maitake mushroom, Hong Zao, Ren Shen, Gou Qi Zi, & Huang Qi. In this group, only the Huang Qi (stick-like root at the bottom) is not edible and will be removed after cooking.


Step 4: Remove from heat and strain the herbs out. You'll have a nice container of herb broth that you can now use as is - keeps for up to 7 days in the refrigerator & you can freeze it.


THAI CABBAGE SOUP with QI BUILDING HERBS
This soup is delicious and gives a good idea of how you can play around with edible Chinese herbs. The purpose was to give workshop participants a sample of how easy yet deeply satisfying herbal broths can be, and also how strongly you can "feel the Qi" from them!
Step 1: either make your own broth (vegetable or meat), or use an organic pre-made broth of your choice. I usually use 4 cups of broth and add additional water as needed.
Step 2: Get the herbs ready to add to the broth. For this recipe I used Huang Jing, Kombu, 1 dried Maitake mushroom, Hong Zao, Ren Shen, Gou Qi Zi, & Huang Qi. In this group, only the Huang Qi (stick-like root at the bottom) is not edible and will be removed after cooking.

HINT: I have found it much easier to add most herbs as they are, and chop them into small pieces after they have softened from being cooked in the broth. The Hong Zao (red dates) however are extremely soft after cooking, so I usually cut them while still dry, as below:

Step 3: Begin warming the broth in a stainless steel pot on the stove. Add the herbs, cover, bring to a gentle simmer for 30-minutes.


Step 5: If desired, chop the edible herbs into small pieces and add back into the broth. They are very tasty and add a somewhat exotic quality to whatever you cook them into.
HINT: If using both edible & non-edible herbs, be sure to place non-edible herbs in a muslin bag or cheesecloth so you can easily separate & remove them.

Here you can see how the same herbs from the 1st picture have plumped up and softened. They will now be very easy to cut into little pieces.

HINT: If using both edible & non-edible herbs, be sure to place non-edible herbs in a muslin bag or cheesecloth so you can easily separate & remove them.

Here you can see how the same herbs from the 1st picture have plumped up and softened. They will now be very easy to cut into little pieces.
Step 6: In a food processor, shred 1 large potato, a bunch of carrots, and 1 small green cabbage.

Step 7: In a large soup pot, heat a spoonful of coconut oil and a dash of olive oil. Once hot, add a healthy shake of "Panch Phora" Indian seeds. This is a great combination of fenugreek, brown mustard seed, nigella, cumin, and fennel. If you're in Anchorage, I get mine at Summit Spice & Tea. I also added about 1 Tbsp fresh chopped ginger root.
Step 8: Once the seeds release their scent and begin to lightly pop, add all of the shredded veggies. Then add the herbal broth. Add additional water if needed to make a nice soup consistency.

Step 8: Once the seeds release their scent and begin to lightly pop, add all of the shredded veggies. Then add the herbal broth. Add additional water if needed to make a nice soup consistency.

Step 9: Cover and simmer for about 30-minutes, until veggies are cooked well. If desired, add a small amount of curry and salt to taste.
HINT: When cooking with Chinese herbs, it's best to keep additional spices to a minimum. In this soup, I added about 1/4 the amount of Panch Phora and Curry that I would normally use.
Step 10: Remove from heat and allow to cool for 10-15 minutes. Then add 1 can Coconut Milk, stir well, and it's ready to serve. Enjoy!! (Makes about 8-10 servings)

Tuesday, March 27, 2012
Medicinal Mushroom Risotto

This recipe is from my 5-Element Nutrition workshop on Medicinal Mushrooms. It wonderfully boosts your immune system, is anti-viral, increases circulation, and makes your Spirit happy. Enjoy!
Ingredients:
2 Tbs Olive oil
2 Tbs Butter
1 shallot, chopped
2 cloves garlic, chopped
1 Tbs fresh lemon zest, chopped (about ½ lemon)
8 Shiitake mushrooms, de-stemmed and chopped (ok to use fresh or re-constitute dry ones)
1 Maitake mushroom, chopped (ok to use fresh or re-constitute dry one)
4 cups Arborio rice (rinsed, uncooked)
1 cup dry white wine (optional - if you leave out increase water by 1 cup)
2 cups mushroom broth (OR chicken or vegetable)
5 cups water
dash of salt
fresh juice of ½ lemon
1 cup fresh parsley, chopped
1 cup pecans or walnuts, chopped
black pepper to taste
1. Heat the olive oil and butter in a pressure cooker.
2. Sautee the shallot and garlic. When browned, add the fresh lemon zest and stir around until you smell the lemon.
3. Add all of the mushrooms and sauté until starting to brown.
4. Add rice and stir.
5. Add all of the liquids (white wine, broth, water) and stir. Add a dash of high quality sea salt and lemon juice.
6. Close the pressure cooker. When ready, pressure cook for 7 minutes. (NOTE: I really like to make risotto in a pressure cooker, but if you don’t have one it’s fine to make it in a large pot – you just have to stir about 1 cup of liquid in at a time and keep stirring for about 35-40 minutes.)
7. When done, open the pressure cooker and add the parsley and nuts.
8. Sprinkle with black pepper to taste. For an added bonus, serve with a glass of water containing 8-10 drops of Reishi (Ling Zhi) Mushroom Tincture.

Subscribe to:
Posts (Atom)
